Tomatoes

Tomatoes
Showing posts with label Chocolate. Show all posts

Saturday, June 27, 2015

Rich Chocolate Gelato

It is the end of June, but I think that I am finally ready to resume with more ideas than ever! All over the West Coast there are heat warnings so the first thing that comes to mind is ice cream. Now some people might just check their freezers, but sometimes its fun to make your own from scratch. To make a gelato different from an ice cream, it has a custard base. Homemade gelato's normally taste better after the original night, and maintain a better consistency, but it all depends on the recipe.

This chocolate gelato tastes amazing right after it is taken out of the ice cream maker, but it is a little melty. When making gelato, it is important to always remember to leave scooping time if you want it to not be melty. Otherwise, if you really cannot wait, just enjoy it fresh from the machine.

First, whisk the egg yolks until combined.

Next add in the sugar. Try to keep the sugar somewhat contained and in the bowl.

After that bring the milk to a boil, and make sure to keep whisking it so that it doesn't burn. As soon as it boils, take it off of the heat and slowly incorporate it into the egg yolk mixture, and be careful that the egg yolks don't curdle. Add the milk in a steady stream and continue mixing the egg yolk mixture very quickly with the other hand.

Melt the chocolate on the stove until smooth and satiny, adding a little cream or milk if necessary. The better quality chocolate that you use, the better the final product will taste. Then, mix the melted chocolate into the custard mixture until fully combined. Add the cocoa powder and mix well. Place into medium sized sauce pan over medium heat and stir. Do not let it come to a boil!

You will know it is done, when the consistency has thickened, and the custard coats the back of a wooden spoon (or in this case a spatula).

Next comes the part that can be intimidating, but it really isn't. Make a caramel in a separate small saucepan using a little sugar and a little water. The caramel should be a dark brown. Be very careful not to burn the caramel, and take it off a few seconds before it seems like it is done, because it will continue cooking in the pan. Incorporate the caramel into the custard. A quick note that will make your life much easier: caramel is sticky business so put it right in the sink after you have removed the caramel.

Place it in a separate clean bowl and refrigerate for half an hour. Follow the instructions for your ice cream maker and...

It is done! Unless you want to freeze it for awhile longer... but who can wait that long anyway!


Rich Chocolate Gelato
Serves: 6
Time: 2.5 hours (or more depending on desired consistency)

Ingredients:
4 egg yolks
2/3 cup sugar
2 cups milk
3.5 ounces bittersweet chocolate
2 Tablespoons cream (optional)
1.5 ounces cocoa powder
2 Tablespoons granulated sugar

In a bowl, beat together the egg yolks and gradually add in the sugar and continue to whisk until the mixture is pale yellow and fluffy. In a saucepan, bring milk to a boil. Remove from heat and add to egg yolk mixture, whisking quickly so that the eggs don't curdle.

Melt the chocolate in a double boiler until smooth (I added a little cream here to achieve the correct consistency). Pour into the custard mixture and blend thoroughly. Add the cocoa powder and mix well. Pour into a medium sized saucepan and place over medium heat. Do not let it come to a boil. Stir until the mixture thickens and coats the back of a wooden spoon.

Next make the caramel. Heat two tablespoons of sugar with two teaspoons of water in a small saucepan until a darkly colored caramel is formed. Be careful not to burn it. Blend the caramel into the custard and place it all in a clean bowl.

 Refrigerate it for half an hour. Place in an ice cream maker and follow the manufacturers instructions. If it doesn't get to your desired consistency, try putting it in the freezer for a few hours. The final consistency should be smooth without lumps and not too firm, yet not too soft. Enjoy!


Friday, December 19, 2014

Oreo Truffles

These are absolutely amazing. That said, they are not the healthiest, or the most complicated truffles ever. This has 3 main ingredients, and lots of varieties!
First, process the Oreos until they are crumbs. Next, blend in the cream cheese. Blend these 2 ingredients together in a food processor or blender. This is the easiest way to incorporate the ingredients. Next, roll them out into balls. The balls should be however big you want your Oreo truffles. The best size for 2 bites is about 1 inch in diameter. 
Place onto parchment or a silicon baking mat. Place in the freezer for at least 30 minutes. I put mine in for 24 hours because I didn't have time to finish them. This made the chocolate harden very quickly and made it even easier to dip them as they did not become squishy.
Stick a toothpick into a hardened Oreo ball and proceed to cover in chocolate, rolling off any excess. Voila! You have made Oreo truffles.
Enjoy!


8 oz.   Cream Cheese
40      Oreo Cookies
12 oz. Chocolate Chips
3 T    Shortening

In a blender, crush the Oreo cookies until finely ground. When ground, add the cream cheese and blend until incorporated. Form the mixture into balls and place on a non-stick baking mat or parchment paper. Place in the freezer for at least 30 minutes. 

Heat the chocolate chips and the shortening at intervals of 30 seconds until completely melted. I suggest melting a in tall cup to make it easier to dip the Oreo balls. Take the Oreo balls out of the freezer and stick toothpicks in the centers. Dip the Oreo balls into the chocolate, twirling to let excess chocolate drip off. Place back onto the silicon mat and let sit, or place in the refrigerator to speed up the process. These are great for sharing with friends, if they survive that long!


Saturday, December 6, 2014

Hot Cocoa

As the winter season rounds the corner and the temperatures drop lower and lower, we begin to crave hot drinks to go with the cold weather. Hot Cocoa is one of the all time favorites for the kids, because who doesn't like chocolate? This is a simple recipe made for one which can very easily be multiplied or halved.
First, measure out the cocoa, sugar, and milk.
Whisk together the cocoa, sugar, and 2 tablespoons of milk over low heat until the sugar and cocoa dissolves. 
Make sure the cocoa mixes in well or it will be chunky when you add more milk.
Add the rest of the milk, taste test for sugar and add more if necessary. Heat it up so that it is hot, then add the vanilla and pour into cups. You are done! Unless of course, you are like me and want to add some marshmallows. 
Voilá! You are done, and it only to 5 minutes. This recipe is extremely easy to duplicate.

Ingredients

  • 2 tablespoons unsweetened cocoa powder
  • 1 to 2 tablespoons sugar (depending on how sweet you like it)
  • Pinch of salt
  • 1 cup milk or any combination of milk, half-and-half, or cream
  • 1/4 teaspoon vanilla extract

preparation

Whisk together the cocoa, sugar, salt, and about 2 tablespoons milk in a small saucepan over medium-low heat until cocoa and sugar are dissolved. Whisk in the rest of the milk and heat it over medium heat, whisking occasionally, until it is hot. Stir in the vanilla and serve.
If you like it frothy, blend it in the blender.
This recipe multiplies easily. When you get up to a quart of milk, use 1/4 teaspoon salt.


Sunday, October 26, 2014

Cowboy Cookies

So last night I had a dilemma, I really wanted to bake something for dessert but I could not decide no matter how hard I tried, I looked through all the cookbooks and probably wasted most of my time for baking. Finally I settled on some comfort cookies, Cowboy Cookies.

These cookies are quite similar to chocolate chip cookies, except they are a little healthier
First measure out the oats into a medium sized bowl

Next measure out the flour

Now measure the baking soda, baking powder, and cinnamon

In a mixer, mix together the butter and the sugars

Get the chocolate chips

Add the chocolate chips to the cookie dough

Voila, these cookies may not be the most visually appealing, but they are certainly one of the biggest hits! This makes 24 very large cookies, or a bunch of smaller cookies. Keep in mind, if you make them smaller, do not cook them for as long.

  • 2 cups old fashioned oats
  • 2 cups flour
  • 3/4 teaspoon baking soda
  • 1/2 teaspoon baking powder
  • 1/2 teaspoon salt
  • 1/4 teaspoon cinnamon
  • 1 cup unsalted butter, softened
  • 1 cup light brown sugar, packed
  • 2/3 sugar
  • 2 eggs
  • 1 teaspoon vanilla extract
  • 2 cups semi-sweet chocolate chips
  • 1 cup walnuts, chopped

  • In a large bowl, stir together the oats, flour, baking soda, baking powder, salt and cinnamon. In a separate bowl, blend the butter and sugars with an electric mixer until smooth, about 2 minutes. Add the eggs and continue to beat until fluffy, about 1 1/2 minutes. Blend in vanilla. Using a wooden spoon, stir the dry mixture into the butter mixture one half at a time. Mix in the chocolate chips and walnuts (if using). Refrigerate the dough for 1 to 2 hours. Heat oven to 350°F. Line a large baking sheet with foil, then grease the foil. Using a cookie scoop, or ice cream scoop, shape the dough into balls and place them on the sheet about 2 inches apart. Use your fingers to flatten each ball to 1/3 inch thick. Bake 13 to 14 minutes.
Recipe adapted from Family Fun

Sunday, October 19, 2014

Chocolate Molten Cakes

These are everything that the restaurants claim. They are super simple, despite what it may seem. I would like to apologize for the bad quality of these pictures, but I was having a last minute craving so what could I do? I just decided to make them after it was dark outside. I apologize, but hopefully the recipe will make up for it!


First, butter or use canola oil spray to coat the ramekins. Then coat them in flour.
Second, crack the eggs, and the egg yolks.
Beat until pale yellow and foamy, I recommend a mixer for this or you will have very tired arms.
Next, measure the chocolate.
Get one stick of butter and melt the chocolate.
I recommend cutting up the butter because it will melt faster and more evenly.
Now you have smooth chocolate.
Add the chocolate and FLOUR, to the egg mixture. Do not forget the flour.
Make sure to incorporate it very quickly, or you will end up with cooked eggs. Once some of the chocolate is incorporated, the ratio of egg to chocolate should be enough so that the eggs do not cook.
Divide it evenly among the four floured ramekins. Now it is time to cook them.
When they are done, they are slightly cakey, but you don't want them to cook all the way through, or you will lose the whole point of "molten" chocolate cakes.
Voila! Chocolate molten cake!
If you decide to turn it out onto a plate, I may suggest cooking it a little more so that the side hold together. Or you can just have a messy cake. I like lots of pudding goodness. You just made a chocolate molten cake! Congrats.

  1.        1 stick (4 ounces) unsalted butter
    1. 6 ounces semisweet/bittersweet chocolate
    2. 2 eggs
    3. 2 egg yolks
    4. 1/4 cup sugar
    5. Pinch of salt
    6. 2 tablespoons all-purpose flour
    1. Preheat the oven to 450°. Butter and lightly flour four 6-ounce ramekins. Tap out the excess flour. Set the ramekins on a baking sheet.
    2. In a double boiler, over simmering water, melt the butter with the chocolate. In a medium bowl, beat the eggs with the egg yolks, sugar and salt at high speed until thickened and pale.
    3. Whisk the chocolate until smooth. Quickly fold it into the egg mixture along with the flour. Spoon the batter into the prepared ramekins and bake for 12 minutes, or until the sides of the cakes are firm but the centers are soft. Let the cakes cool in the ramekins for 1 minute, then cover each with an inverted dessert plate. Carefully turn each one over, let stand for 10 seconds and then unmold. Serve immediately.
    MAKE AHEAD- The batter can be refrigerated for several hours; bring to room temperature before baking.


    Saturday, September 13, 2014

    Chocolate Pudding Cake

    I don't know what about chocolate pudding cake makes it so good, but I don't think anybody could resist it.
    It is simply cake-like on top with molten pudding consistency on the bottom! It is like your perfect cake with built in frosting on the bottom.
    First whisk together the dry ingredients.
    Then, using my favorite stirring utensil, use a wooden spoon or spatula to combine the wet ingredients.
    Now you put the batter in an UNGREASED pyrex dish. Next comes the more complicated part, the part that makes this cake a pudding cake.
    Mix together the sugars and cocoa in a separate bowl and sprinkle evenly over the top of the batter.
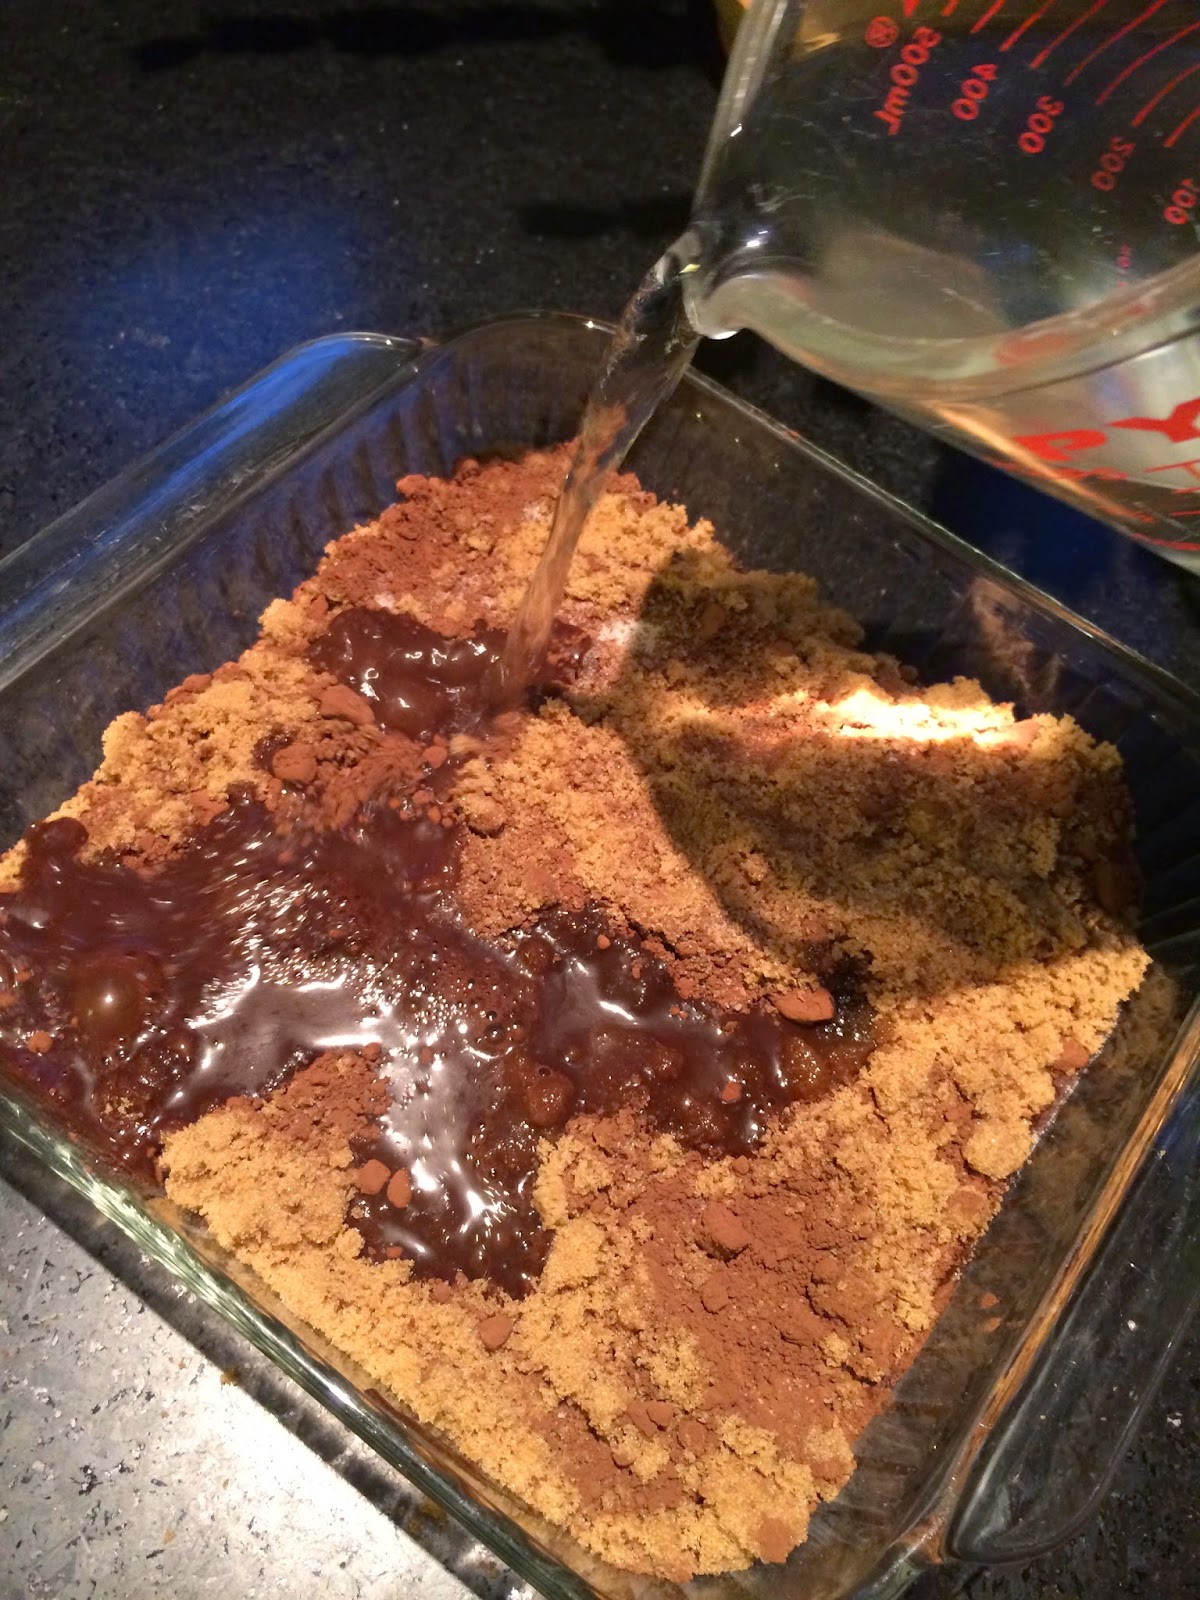
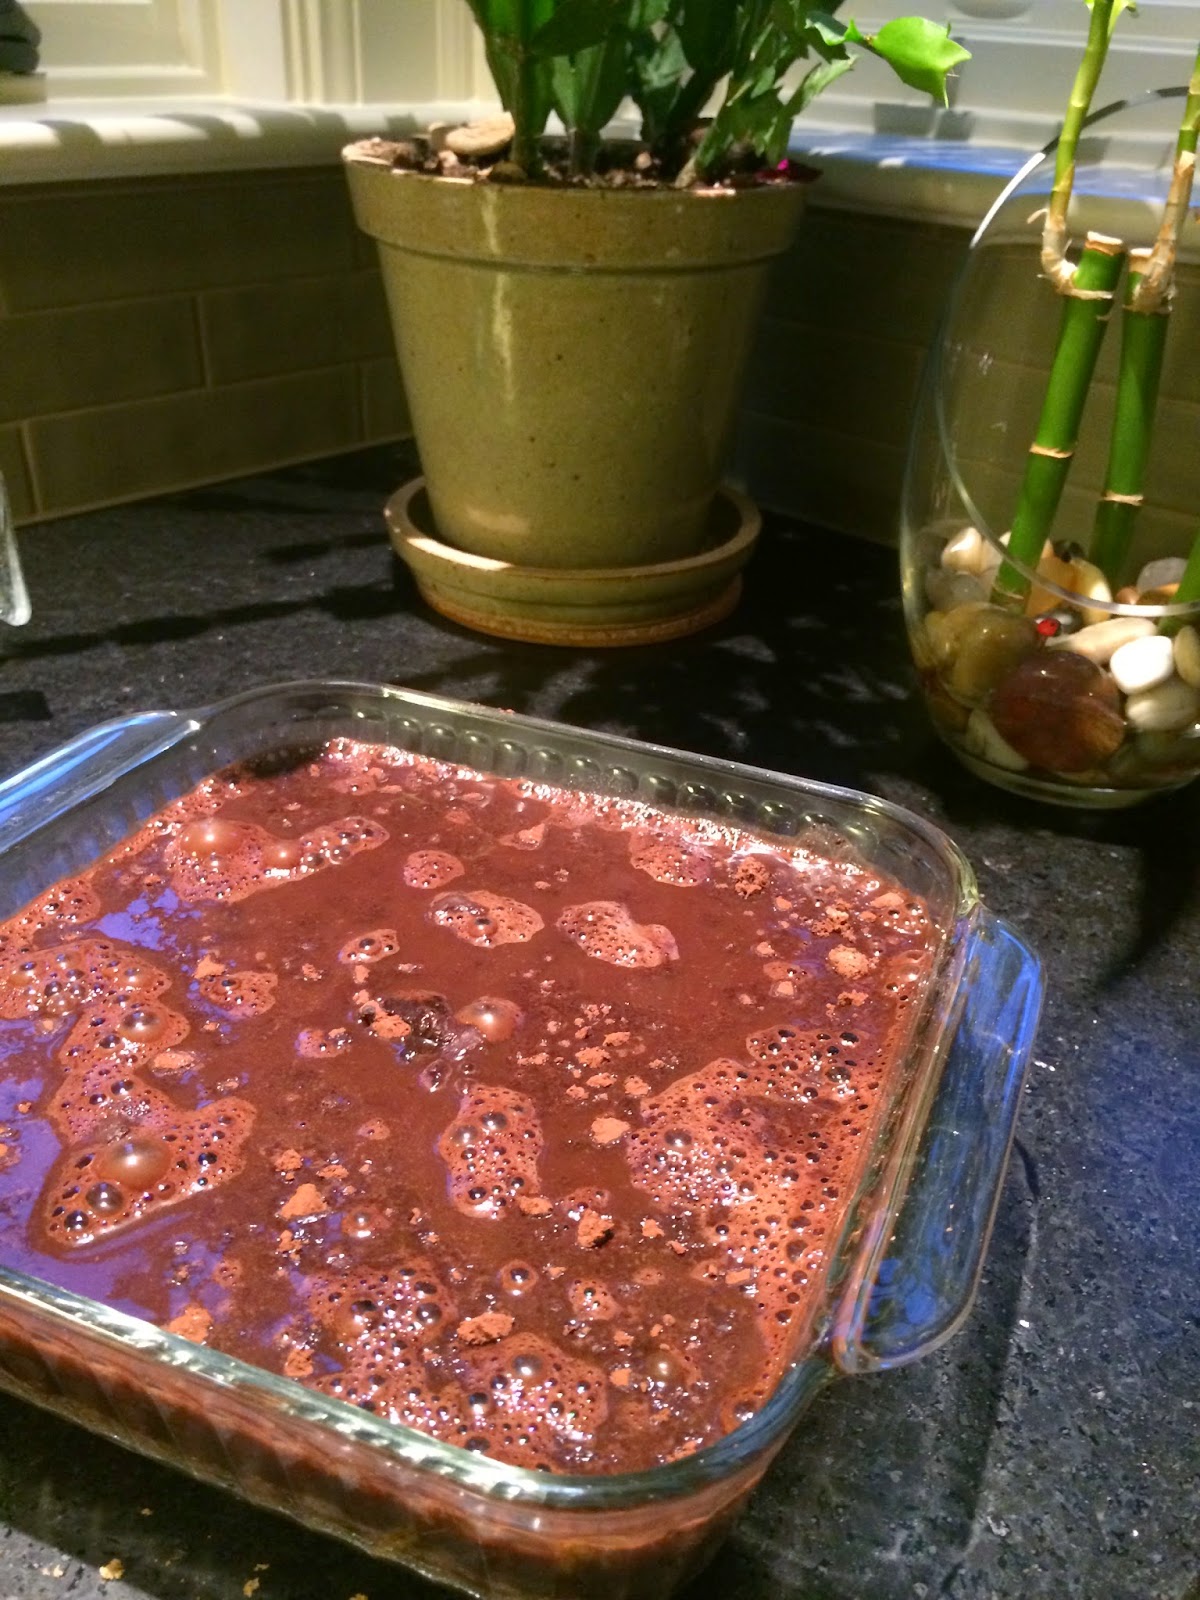
    Next pour water over the dry ingredients and do not mix, no matter how tempting.
    It should look like this before you put it in the oven. I repeat, do not mix. Now put it in the oven VERY carefully and try not to spill.
    Check to see that the top is hard and isn't jiggling wildly, or you will have pudding instead of pudding cake. It should not move from side to side.

    Voila! Dessert is served! 


    Prep Time:20 min

    Inactive Prep Time:15 min
    Cook Time:30 min
    Level:
    Easy
    Serves:
    about 9 servings

    Ingredients
    Pudding Cake:
    3/4 cup granulated sugar
    1 cup all-purpose flour
    1/4 cup cocoa powder
    2 teaspoons baking powder
    1/4 teaspoon fine sea salt
    1/2 cup milk
    1/3 cup butter, melted
    1 1/2 teaspoons vanilla extract

    Topping:
    1/2 cup granulated sugar
    1/2 cup packed light brown sugar
    1/4 cup cocoa powder
    1 1/4 cups hot water


    Directions
    Preheat the oven to 350 degrees F.

    For the cake: Whisk together the sugar, flour, cocoa, baking powder and salt in a bowl. Whisk in the milk, butter and vanilla. Stir together until smooth with a wooden spoon or spatula.

    Pour the batter into an ungreased 9-inch square baking pan. Use an offset spatula to level into pan.

    For the topping: Whisk together the sugars and cocoa and sprinkle it evenly over the batter. Pour the hot water over the top, resist the temptation to stir it into the batter.

    Bake about 30 minutes, you want the center to bubble and look almost set, almost like an undercooked brownie. Take out of the oven and let stand 15 minutes. Serve in dessert dishes, spooning sauce from bottom of pan over top. 


    This recipe was altered from Food Network


    Friday, September 5, 2014

    Chocolate Chip Cookies

    When somebody says cookie, it brings a certain image to mind. The most common cookie is the chocolate chip cookie, and it is the most popular for a reason! If you have never made chocolate chip cookies from scratch, I am proud to say that they are almost impossible to mess up! My second or third time making them I forgot to put in the dry ingredients, but that is a story for another time!


    Here we go!


    First, Mix together the dry ingredients in a small bowl. 

    Next combine the butter, the sugars, and the vanilla!
    Add the dry ingredients into the butter mixture.
    Here is what it should look like, beat it until it is fluffy!
    Ass the chocolate chips to the dough and mix until just combined.
    Now you have two options:
    Scoop the cookies onto a cookie sheet, or put them in a container for later!

    And now you have plenty of cookies! I like them fresh so I make 8 or so at a time and keep the others in the refrigerator.

    Below is the recipe:


    • Ingredients:
    • 2 1/4 cups all-purpose flour
    • 1 teaspoon baking soda
    • 1 teaspoon salt
    • 1 cup (2 sticks) butter, softened
    • 3/4 cup granulated sugar
    • 3/4 cup packed brown sugar
    • 1 teaspoon vanilla extract
    • 2 large eggs
    • 2 cups chocolate chips

    Preheat the oven to 375 F. Combine the flour, baking soda and salt in small bowl. Beat butter, granulated sugar, brown sugar and vanilla extract in large mixer bowl until creamy. Add eggs, one at a time, beating well after each addition. Gradually beat in flour mixture. Stir in morsels and nuts. Drop by rounded tablespoon onto ungreased baking sheets. 

    Bake for 9 to 11 minutes or until golden brown. Cool on baking sheets for 2 minutes; remove to wire racks to cool completely. 


    Recipe courtesy of Nestle